Do you want to know how to create perfectly reflected car images in Photoshop? Then the following article will be highly beneficial to you today. Giving your car a new, professional look with fresh new graphics will create a lot of good impressions with potential buyers. You can create a perfect visual representation of your car’s image by using reflection in Photoshop. You can bring the natural picturization of cars in Photoshop by learning how to create reflections in the program. This gives a tremendous fake-looking effect of a real car, which makes buyers more likely to investigate more about the car.
To make car photos look more lifelike, you can create reflections in Photoshop. This is a great way to add depth and interest to images, and several ways exist. In this lesson, we’ll walk you through the steps of making precisely mirrored automobile photographs in Photoshop. So let’s examine the processes and actions that are involved.
What is car reflection:
Applying Photoshop’s reflective effects to a picture of a car results in a new image where the car appears to be sitting naturally on a polished or reflective surface with its mirrored image, known as a car reflection. It is possible to use image mirrors with scenery, clouds, and other natural textures and designs. Reflective surfaces are common in car dealerships because they make cars look more professional. This makes customers feel more comfortable about investing in them and can help improve the look of car images without distracting them from the product. Car dealers who use reflective surfaces can appeal more to customers than those who don’t, giving them an advantage over their competitors.
Creating Perfectly Reflected Car Images in Photoshop Step By Step:
A good image of the car can be beneficial to ensure the customer’s attention remains focused on the post-production process. You can create a beautiful reflection of a car using the cheapest methods. You’ll need basic supplies; Photoshop can help you do the job quickly. You must open the software and set up your preferences to use Adobe Photoshop. Next, open the workspace and open all of your windows. From below, let’s learn the steps of creating perfectly reflected car images in Photoshop.
First Step: Select an image
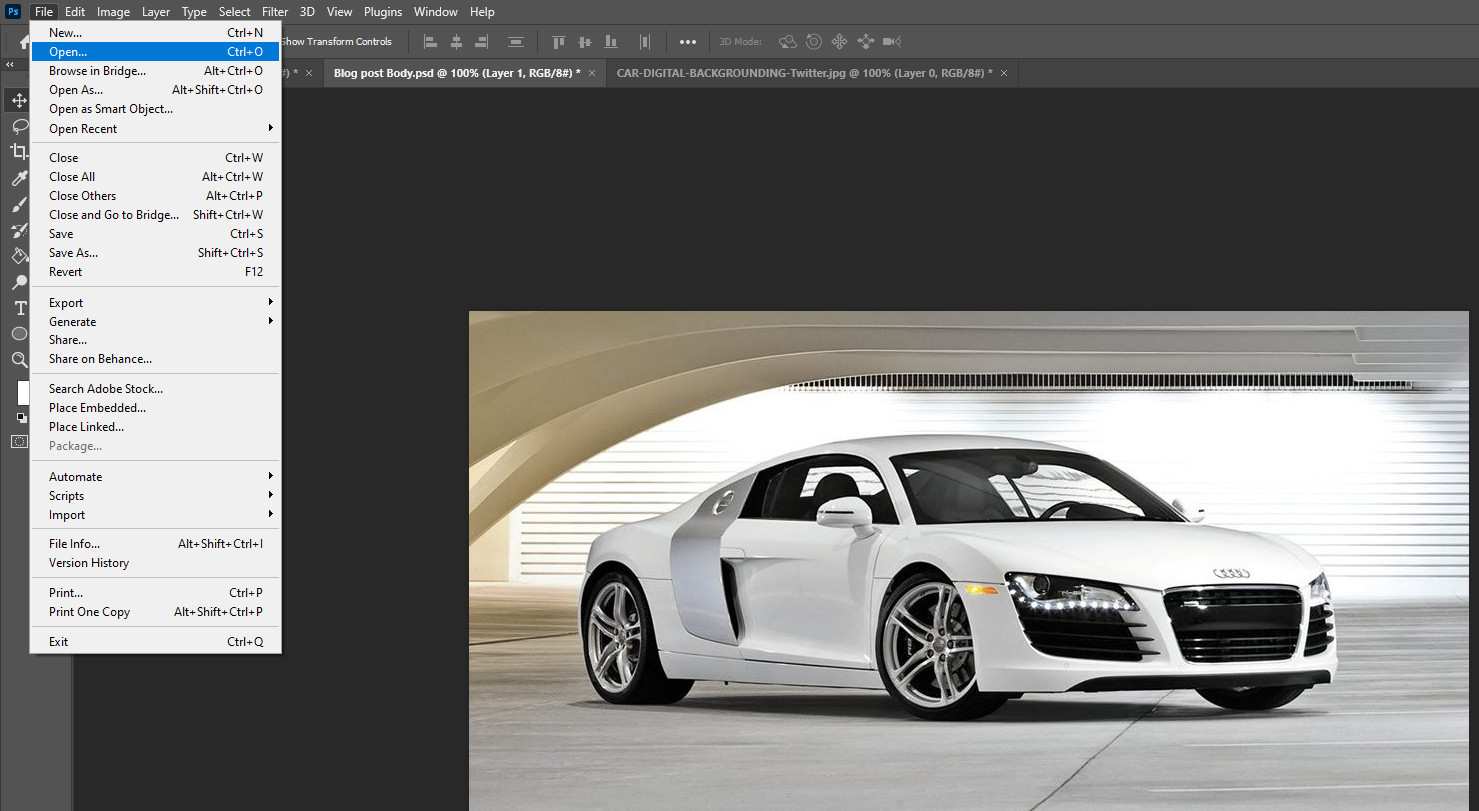
To create a realistic reflection in Photoshop, it is essential to have a clear idea of what you want the final product to look like. First, brainstorm a rough idea of what you want the reflection to look like in your photo. Then, look for images that fit that description. Be sure to check for foreground elements overlapping with the area you want to reflect. Finally, select a photo with a clean bottom line for your reflection. This will make the reflection more realistic looking.
Second Step: Enlarge your canvas
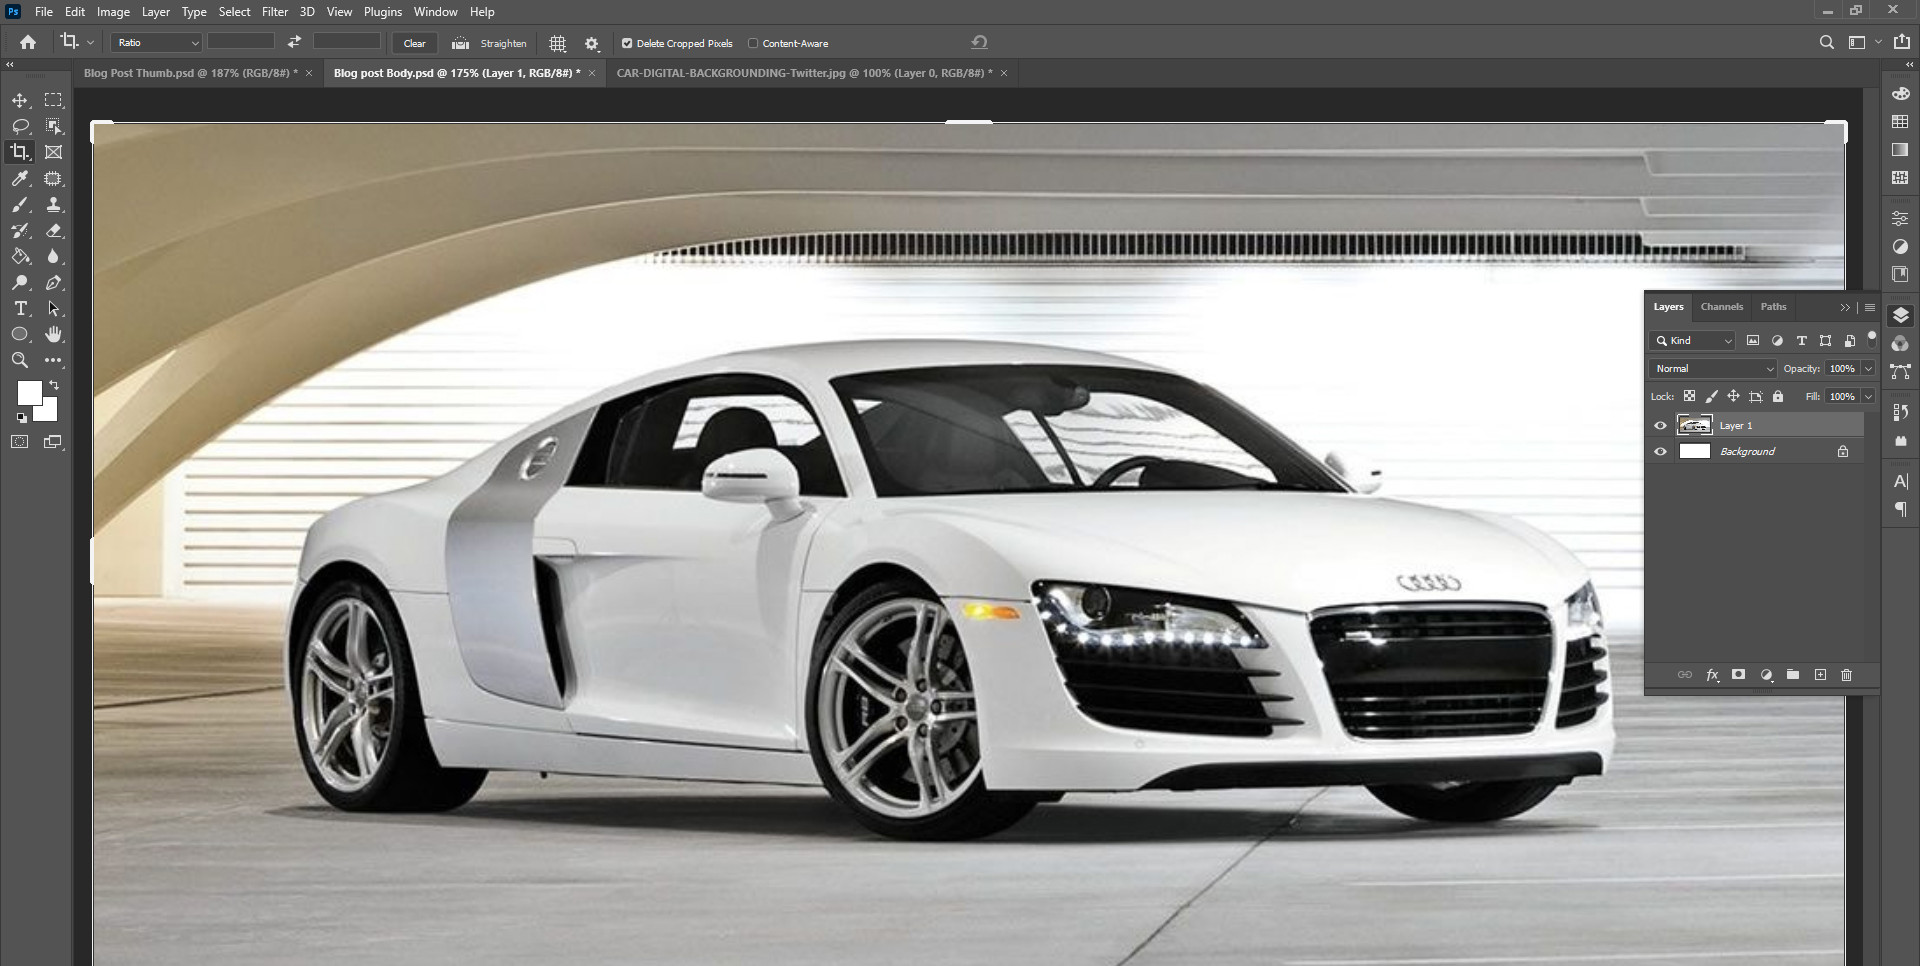
Open the photo you just chose. You should expand your canvas to account for the product’s reflection. Your canvas resizes window will appear when you press Ctrl+Alt+C. You should click the drop-down arrow next to the height input box, choose percent, and then alter the height percentage to 200. To add a new canvas area under the image you’re working on, click the arrow in the top center-right corner of the anchor diagram and then click OK. To ensure your product’s reflection is shown in your photo, your canvas size must be at least twice as big as your original photo. Look for the Image > Canvas Size menu item, and in the dialog box that pops up, choose the “2x” option. This will make your photo appear twice as large on your canvas.
Third Step: Duplicate the layer
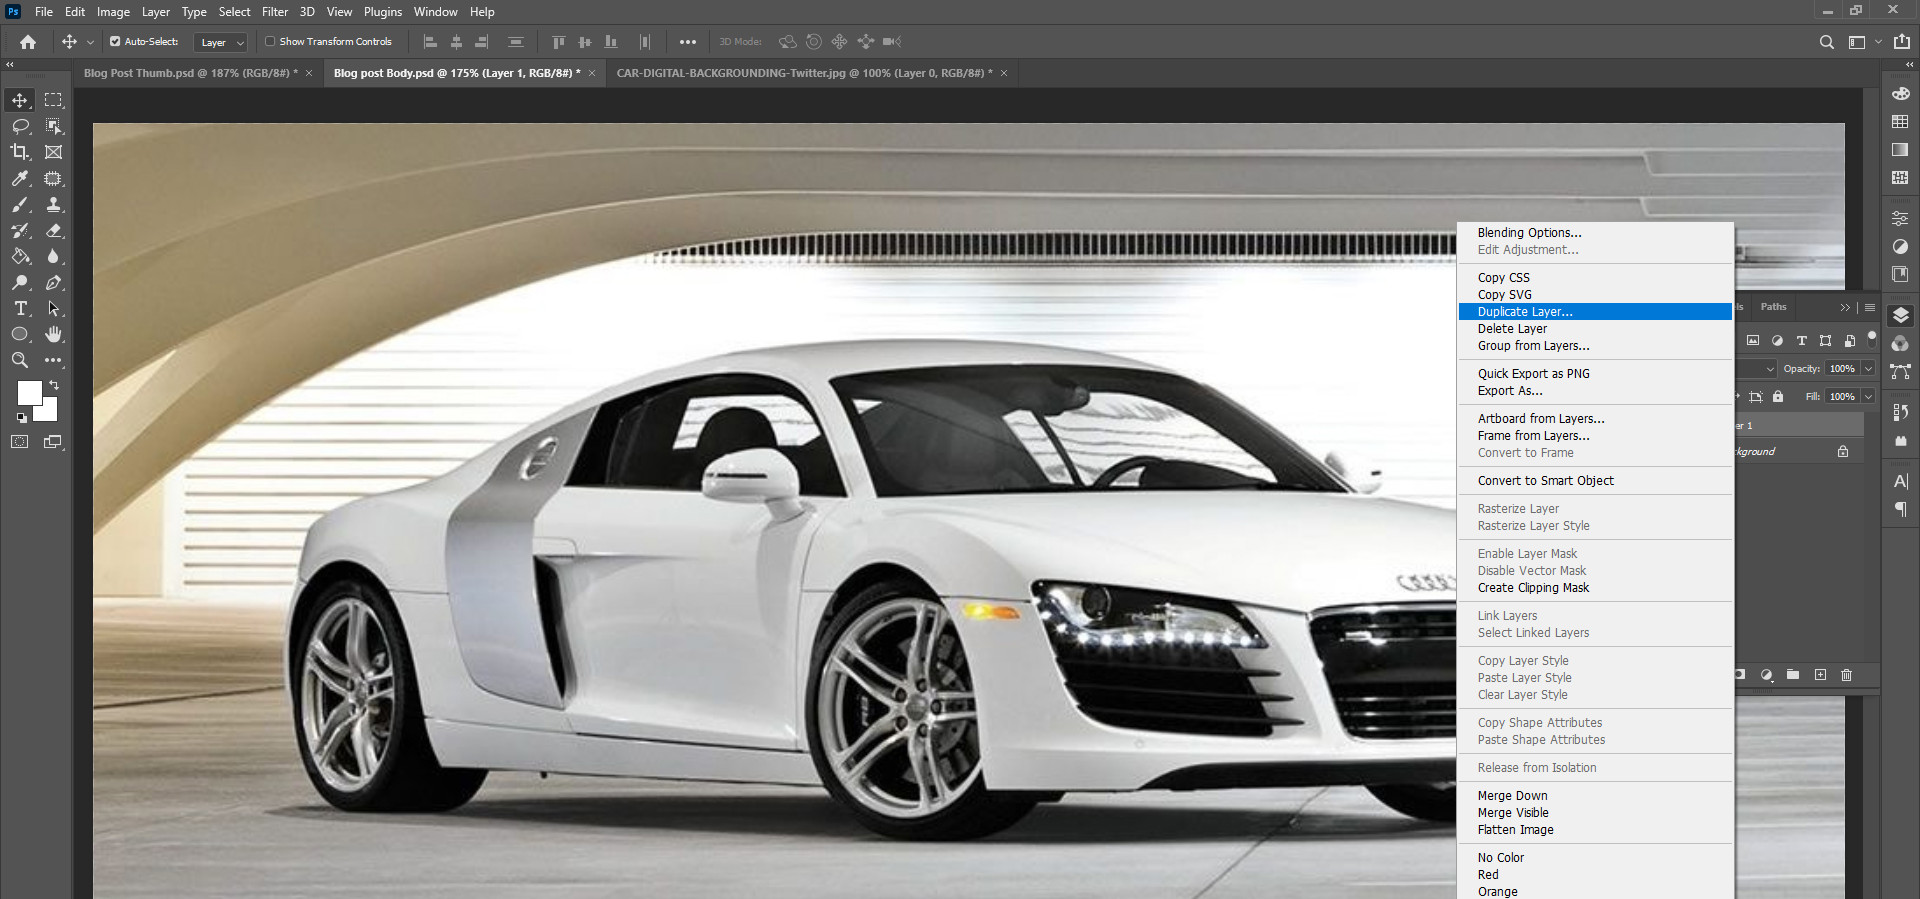
Locking layers by clicking the lock icon in the layers panel is possible. You may duplicate a layer by choosing the layer, pressing Ctrl+j, and then renaming it. Then, pick “convert to smart object” from the context menu when you right-click in the layer panel to create both layers of “smart objects.” Drag the copy layer into position beneath the original layer to finish.
Fourth Step: Flip the Lower Layer and Add Blur
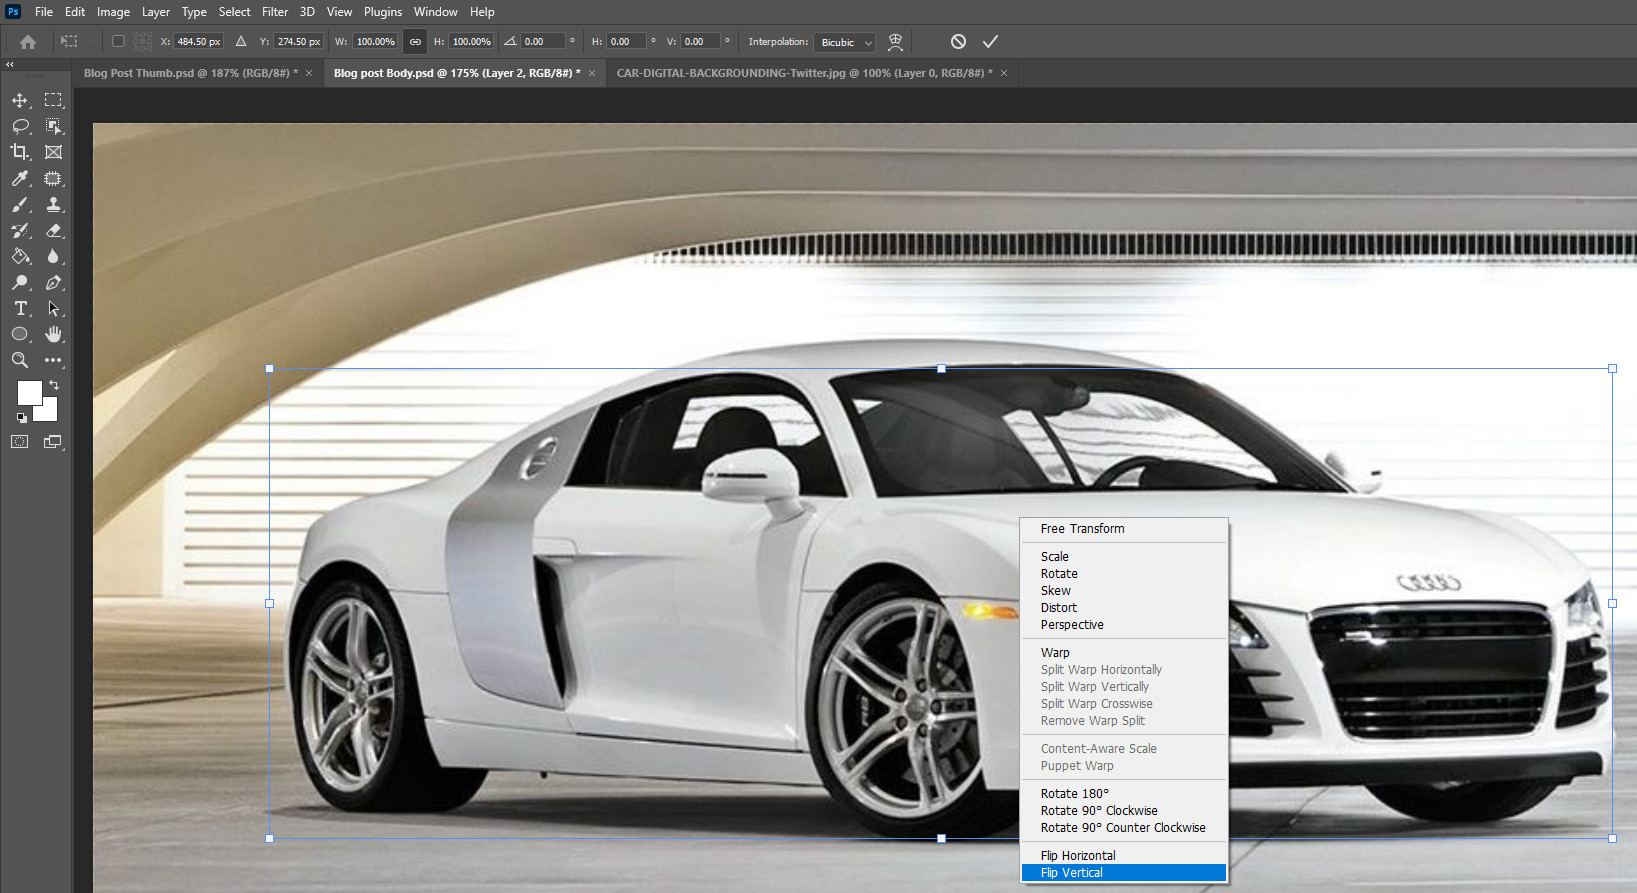
To make your reflection look blurry, you must flip it vertically first. You can do this by directly flipping the transform tool (Ctrl+t on your keyboard). Next, right-click on the targeted image, and choose ‘Flip Vertical’ from the menu. To add a motion blur effect to your image, from the main menu, select “Filters” and then select “Blur-Motion Blur.” To adjust the angle and distance of the Blur, angle your cursor 90 degrees and enter a value for how far away the Blur should be. This will depend on the image resolution and the size you are working with. Remember to adjust your layers one at a time so there is a minimal gap in your image and top layer when necessary.
Fifth Strep: Create a new file
In this step, you will create a new file to help improve the realism of your reflection photo. However, be careful not to create a large file; make it similar to your reflection photo but with a smaller size so that Photoshop can save it. Then, fill your image with the nicest shade of black paint. To finish, click the lock symbol on the Layers panel to unlock the background layer.
Sixth Step: Add the noise /Blur for texture
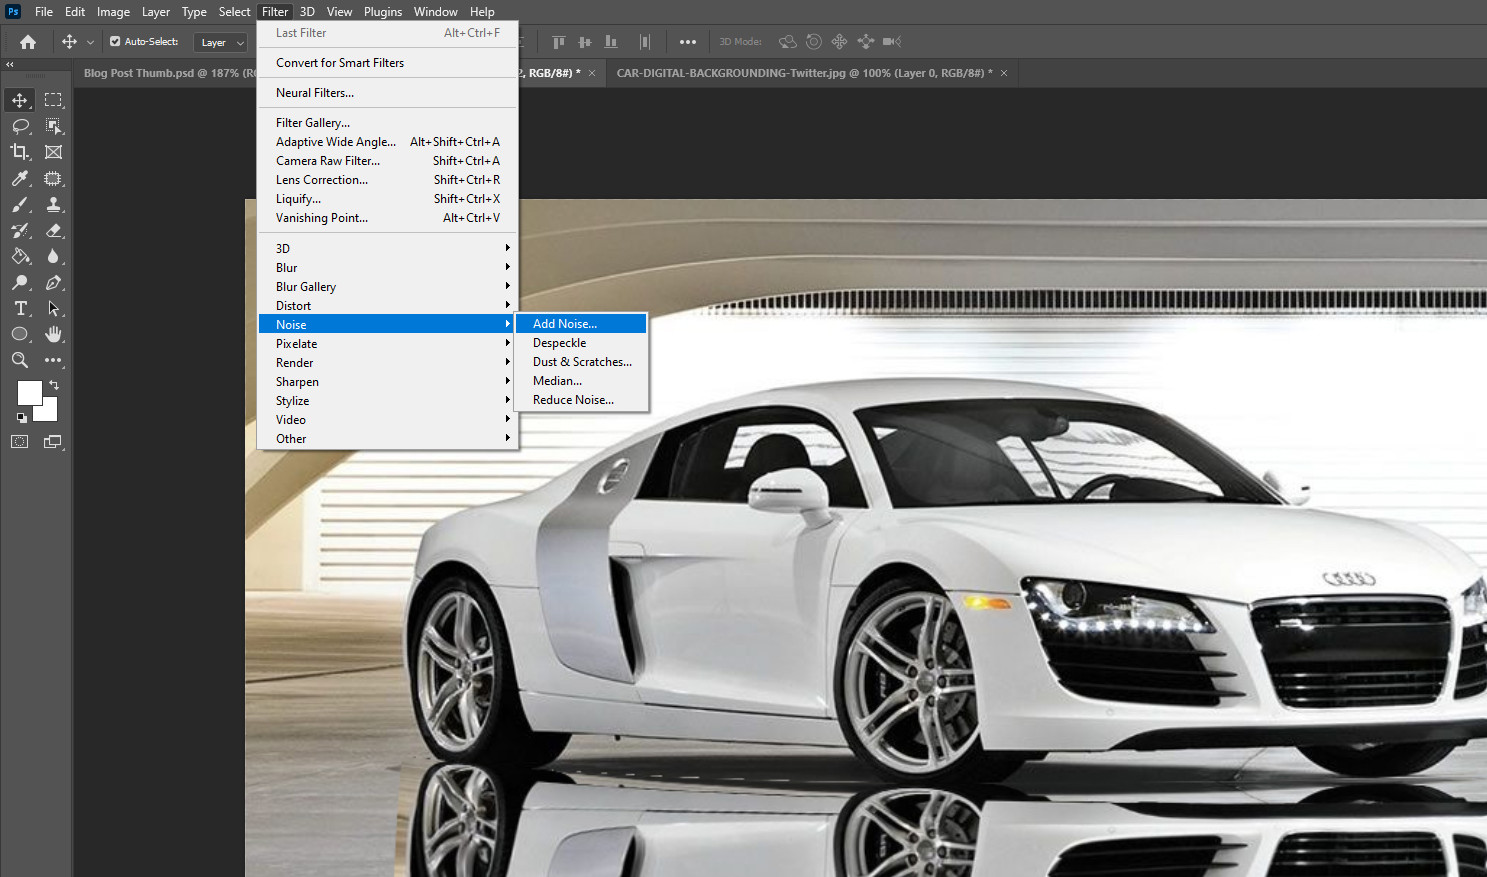
Add noise to the black layer to make a texture, then select the filter-noise-add noise from the top menu. Make about 400 percent, and check the box for the uniform. Next, add more Blur by selecting the filter-blur-gaussian Blur. Click “OK” after setting the radius to 1.5 pixels. You will see some light speckles in your photo at this point. These speckles are not yet textured enough.
Seventh Step: Emboss the image texture
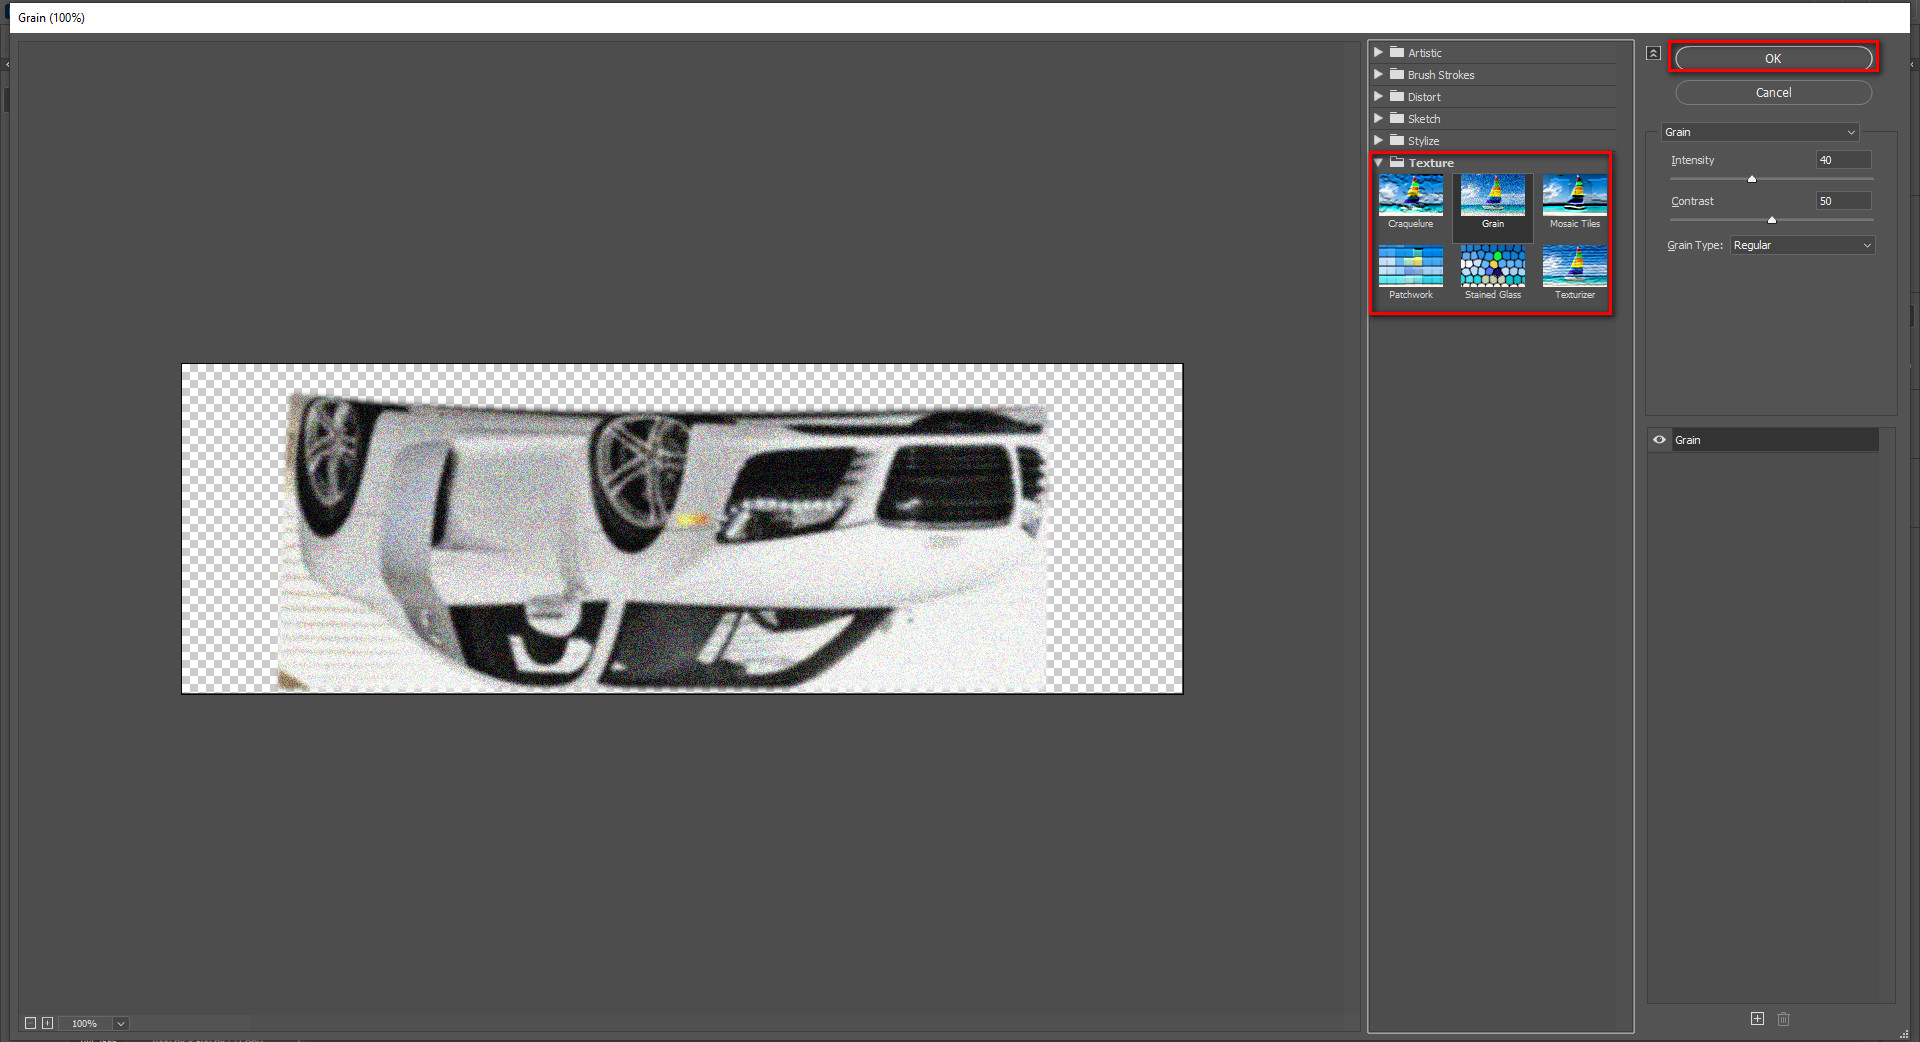
Specifically, select the Red channel after opening your channel panel. Choose a filter from the relevant upper menu to stylize to emboss. Set the angle to 90, the height to 5, and the amount to 500, then select OK. Select the green channel, then use the upper menu to filter, stylize, and emboss. In this instance, You should set the angle to zero. You should click the height to five, the sum to 500, and then the “ok” button. Additionally, transform all of your channels using RGB. Return to the layers panel and then right-click the component you want to make a smart object out of.
Eighth Step: Stretch the perspective
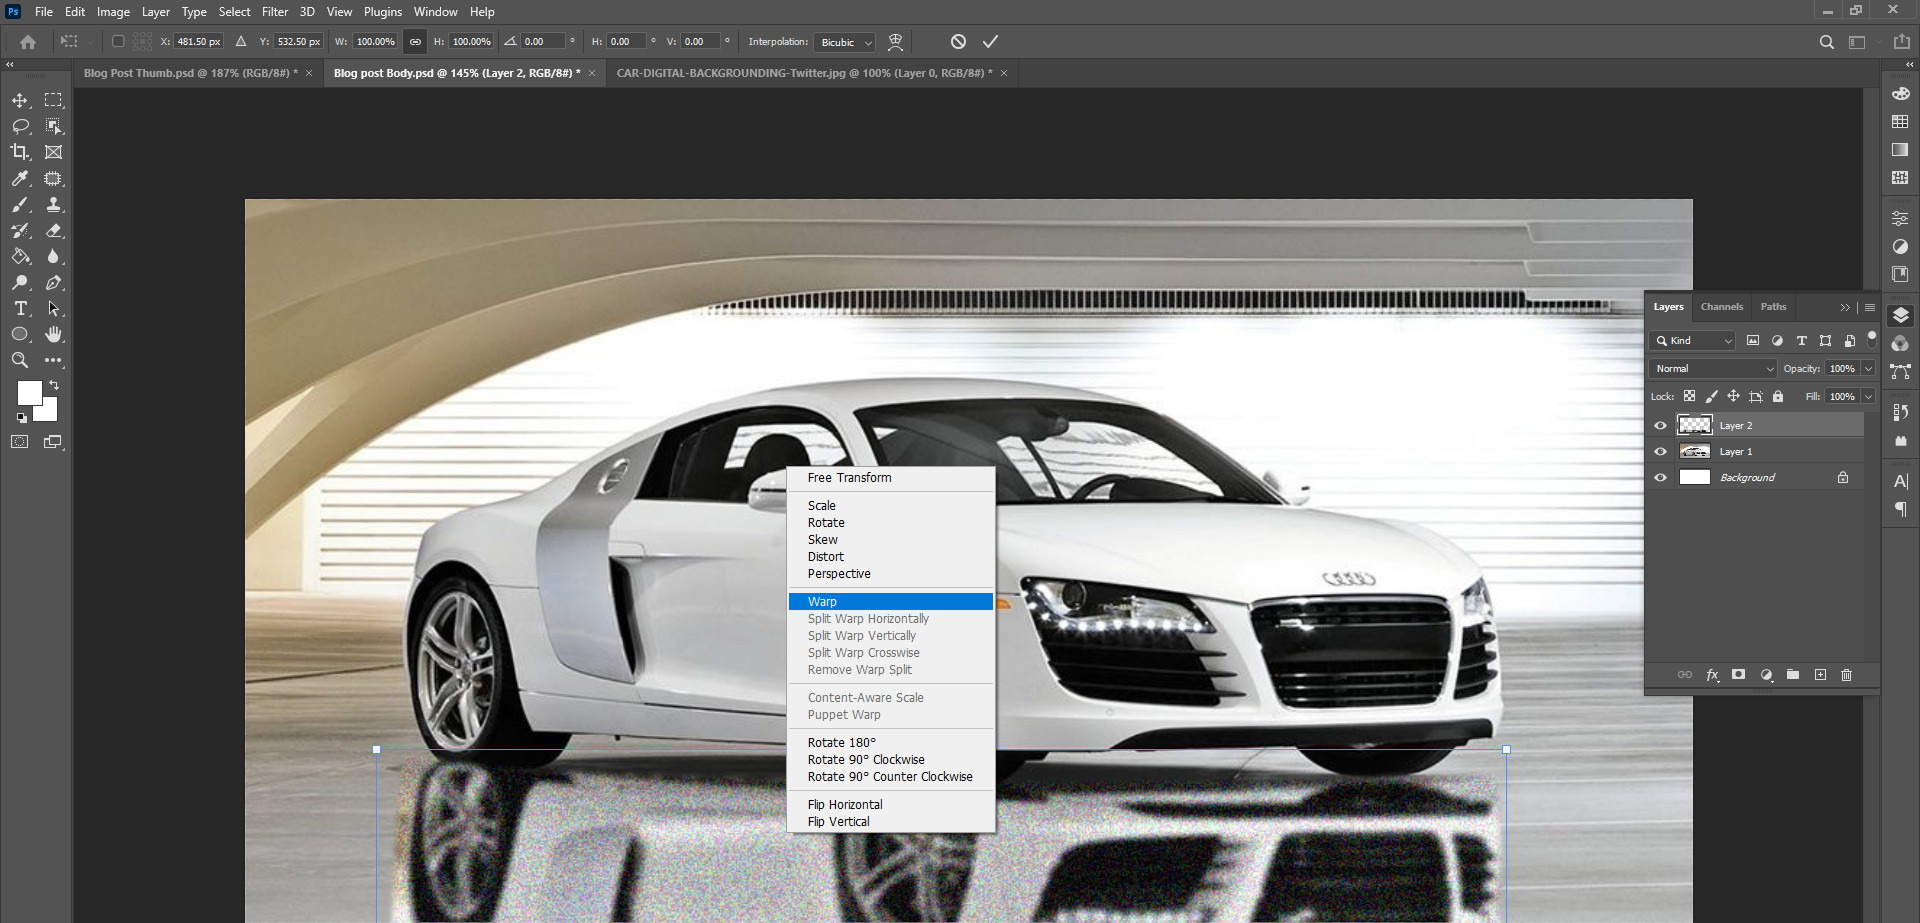
To change the perspective of an image, press “ctrl+t” (hold down the “Ctrl” key and press “t”), then right-click inside the image and choose a perspective from the menu. To make the noise picture smaller on the screen, zoom out. Then, move the transform box’s bottom right or bottom left handle. To make your image look more like a reflection, we’ll need to stretch the base of it and then use noise to make it look more natural. To begin hit Enter to begin the procedure. By hitting the keyboard shortcuts Ctrl+Alt+0, you may fully enlarge your image. Then, resize the noise image to be slightly smaller than the lower half of your canvas by pressing Ctrl+T. Give your image a name and save it to make it easy to locate in the following stage.
Ninth Step: Add the displacement layer
To create a copy of your main image, click on the reflection layer and press Ctrl+j on your keyboard to duplicate it. Name the new layer “Reflection Copy.” Then, from the top menu, select Filter-Distort-Displace. To change the size of the photo, you’ll need to change the horizontal and vertical scales. To do this, use the arrows to move the scales around until they look how you want them to. Then, click “OK.” The new window will open, and you can select the photo you saved with the distortion. In this step, you’ll add a texture as a displacement layer. If the ripple effect looks too small or large, undo that step and redo it again, but this time uses a lower or higher number for the displacement scale. You’ll need to experiment with this to make it look how you want.
Final Step: Tweak the Reflection:
Click on the “layer mask” icon at the base of the “layers panel” to add a reflection of yourself to your image. Pick the “brush” tool next, then set the color to black. Next, right-click on your image, choose “set brush size to be a bit large,” and set the “hardness” slider to zero percent. Finally, close the “window” that popped up. If you have a brush with an opacity of 20%, you can use it to paint side to side over half of the reflection layer, lowering the reflection layer’s opacity by 20%.
You can do this again, and the reflection will become more natural each time. Remember just to choose the layer mask and not the actual layer. Next, select Merge Layers from the context menu in the Layers panel. Click in the curves window, then drag down the middle of your adjustment line. This will darken the reflection layer but drag it down low enough to look more natural. You can do that now if you need to crop the bottom of your photo.
Frequently Asked Questions (FAQ):
Que: Which Photoshop tools can you use to make a vehicle reflect?
Ans: In Photoshop, you must use virtual tools, and layers like workspace settings, the Move Tool, and the Cut Out layer to create a double—layer vehicle reflection.
Que: In Photoshop, how do you create a mirror effect?
Ans: You must select the layer where you want to flip it to create a mirror reflection. Go to Transform after selecting Edit. Next, choose Flip Horizontal. To make the new layer invisible, click the Layer Visibility symbol. You can enable it through the bottom layer. Mark the spot where you saw your reflection in the glass.
Conclusion:
Hopefully, you have understood the process of creating perfectly reflected car images in Photoshop. In Photoshop, creating an image is frequently much simpler than photographing one with a camera. Create an intriguing mirror picture by following these straightforward steps. You can improve a bit of boring shooting. The trick is picking the correct photo because not all images work well for creating reflections. As you practice and experiment, you discover which types of shots the method is most effective.
Make an effort to comprehend and apply this method. Then you can modify it to make different images. You might not want to incorporate the distortion you produced with the displacement layer. This stage is optional but does produce a more mirror-like reflection. This effect is interesting for portraits and products. The most crucial factor is to keep an open mind. However, if you have any more confusion about creating perfectly reflected car images in Photoshop, don’t forget to leave a comment below.
