Home  / 

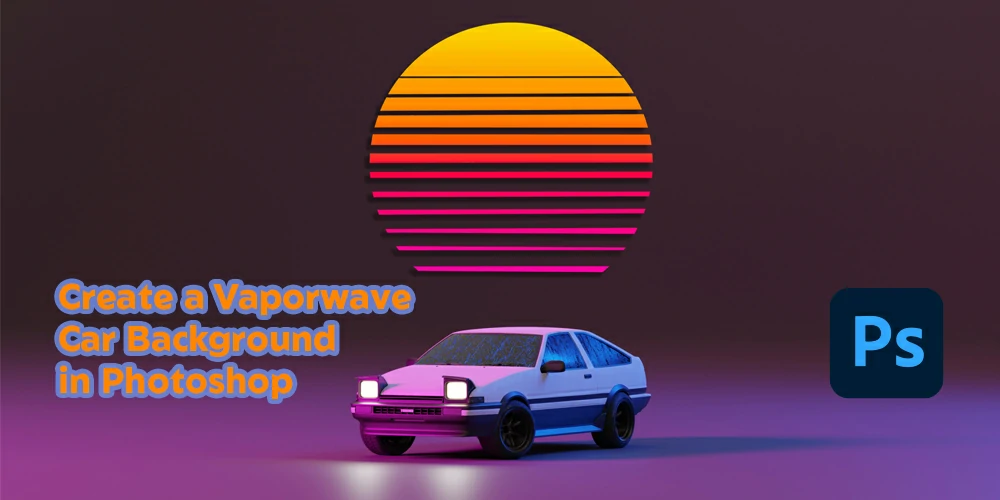
How to Create a Vaporwave Car Background in Photoshop

How to Create a Vaporwave Car Background in Photoshop

To create a vaporwave car background in photoshop, insert your image, add a new layer, add some textures and tweak the colors.

Yes, it’s that easy!

In recent years, vaporwave, a retro-futuristic art form that merges nostalgia with futuristic aspects, has grown in popularity. You can accomplish this in Photoshop if you want to give your automobile shots a hint of vaporwave. 

This article will teach you how to create a vaporwave car background in just a few easy steps.

Step-By-Step Guide On How To Make Vaporwave Edits

Creating a vaporwave background for your car photos in Photoshop is not as complex as you think. All you need to know is a little image editing and Photoshop experience. Follow the next 10 easy steps, and you can do it.

Step 1: Choose Your Image

Choose Your Image

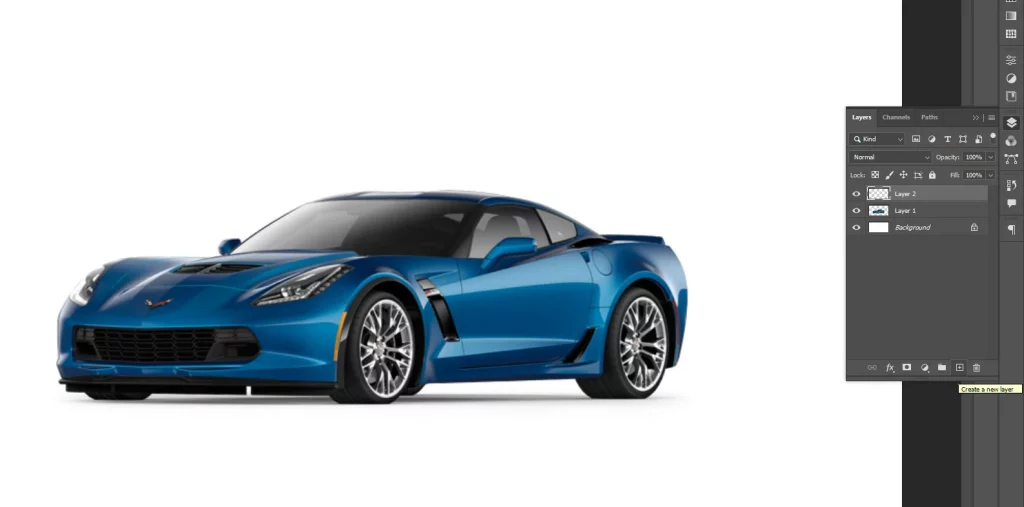
Selecting the image to use as your vaporwave background in photoshop is the first stage in the process. Use an image of a car you own, or go online for stock images. The image has to be sufficiently large to act as a background and have a good resolution.

Step 2: Add a New Layer

Add a New Layer

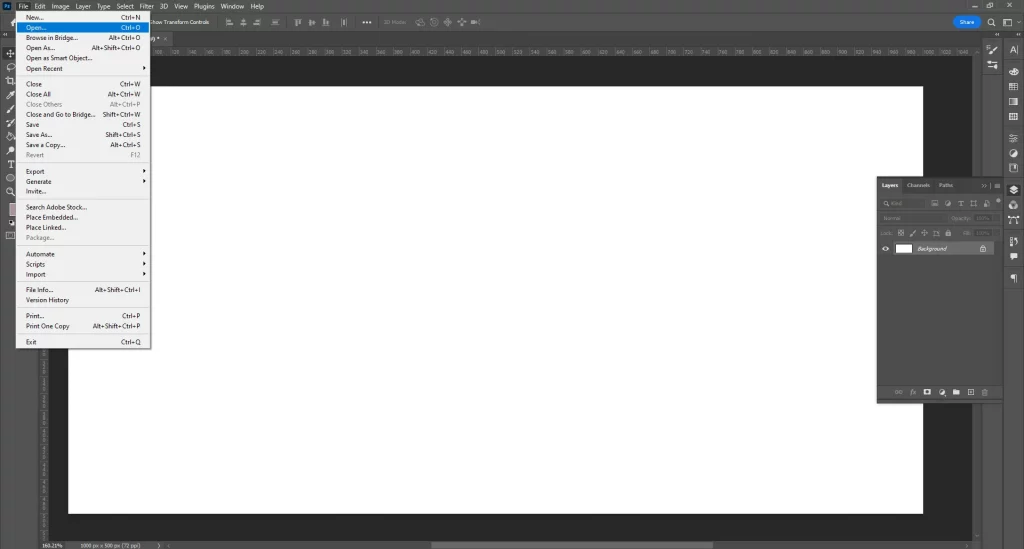
Open the image in Photoshop after selecting it and add a new layer. To achieve this, select Layer> New > Layer from the menu bar or click the “New Layer” button in the Layers panel.

Step 3: Add a Vaporwave Texture

Add a Vaporwave Texture

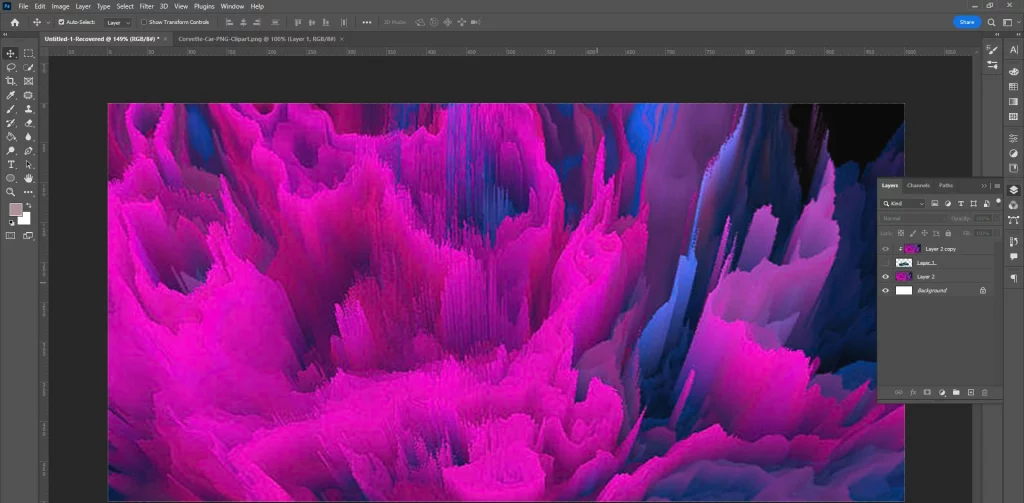
Clicking the “New Layer” button at the Layers panel’s bottom will add a new layer to the document. Name this layer “Texture”. Then, import your Vaporwave pattern or texture and drag it onto the “Texture” layer. 

You can use images like the television effect. To add this aesthetic filter in photoshop, you need to change the Mode option to Soft Light and decrease the value to around 40% to 50%.

Step 4: Change the Blend Mode

Change the Blend Mode

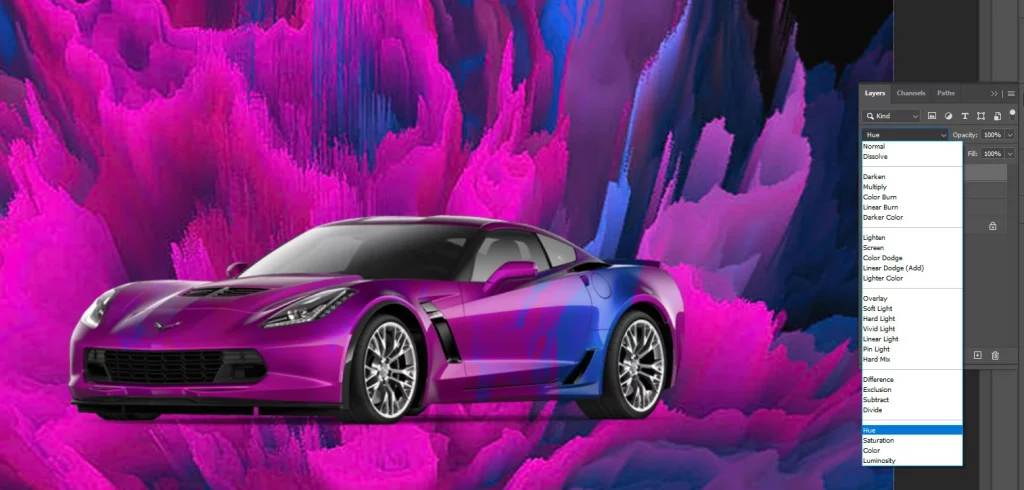
For the “Texture” layer, switch the blend mode to “Overlay.” This will blend this photoshop synthwave filter with the image and add a dreamy and retro-futuristic effect. You can also adjust the Layer’s opacity to control the effect’s intensity.

Step 5: Adjust the Colors

Adjust the Colors

To enhance the Vaporwave effect, you can adjust the colours of the image. To choose “Hue/Saturation,” go to “Image,” then “Adjustments.” To your taste, adjust the saturation and color sliders. Other color modifications, such as “Color Balance” or “Levels,” can also be tried.

Step 6: Add a Color Balance Adjustment Layer

Add a Color Balance Adjustment Layer

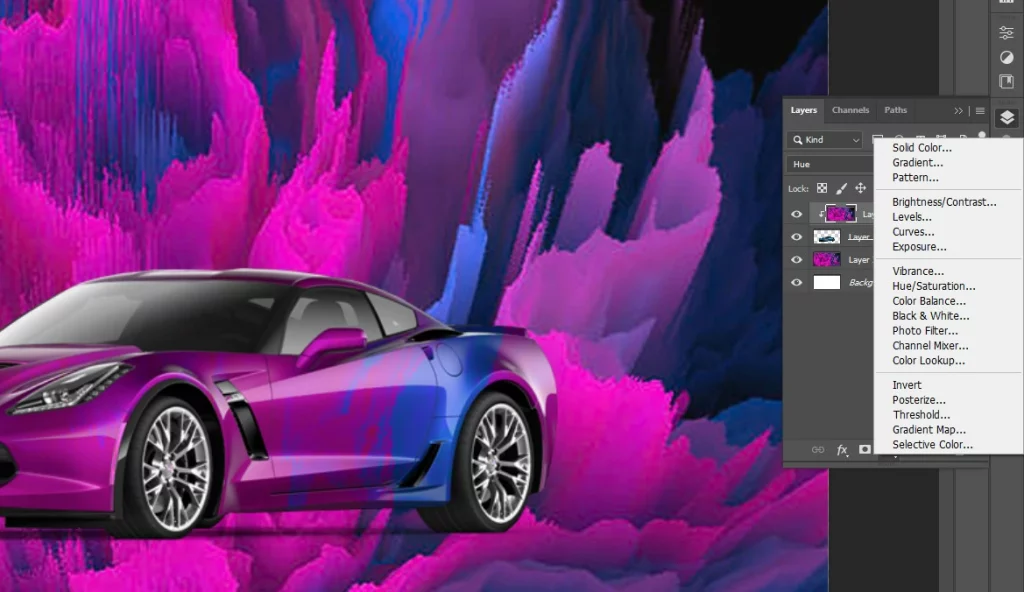
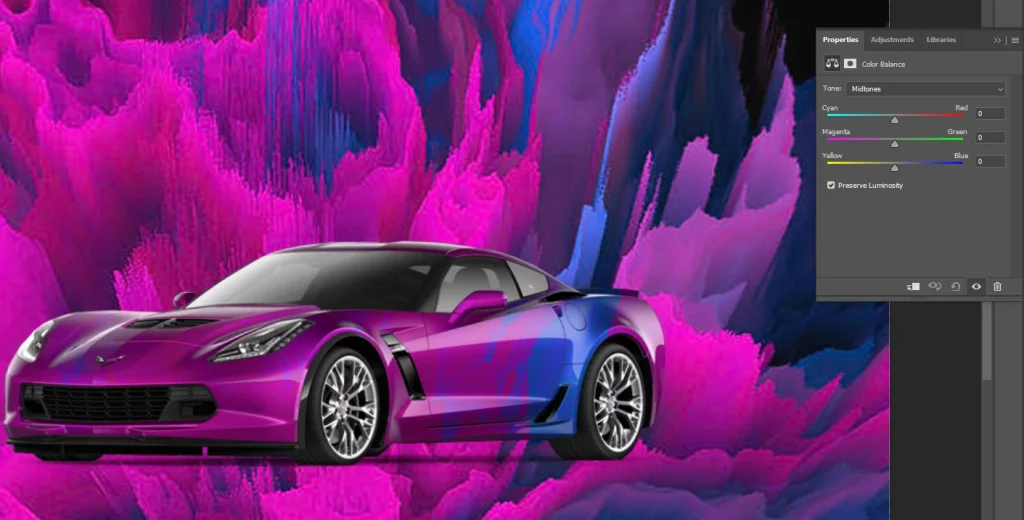
You need to apply a Colour Balance adjustment layer to give your image a more colourful and neon feel. You may use it to increase the saturation and brightness of your image’s colours. 

Add a Color Balance adjustment layer by choosing Layer > New Adjustment Layer > Color Balance. Increase the saturation and brightness settings in the Color Balance dialogue box until you are satisfied with the outcome.

Also, change the Fill colour for this image from around 45% to 50%. To do that, go to the Edit menu from the top, Select the Fill option and select the 50% Gray option from the popup window box.

Step 7: Add a Gradient Map Adjustment Layer

Add a Gradient Map Adjustment Layer

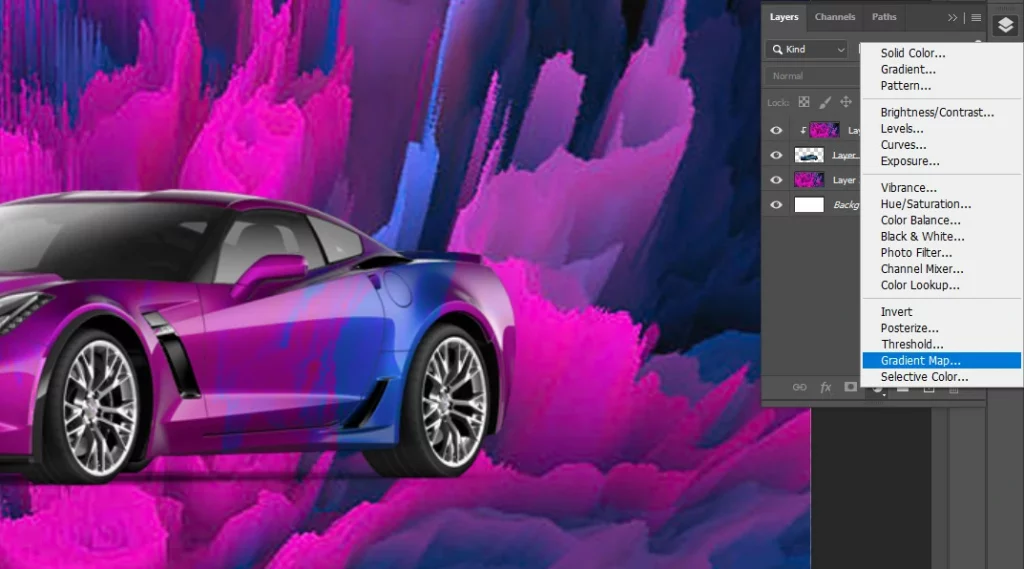
Add a Gradient Map adjustment layer to add extra colour to your vaporwave automobile backdrop. Your image will receive a colour gradient from this Layer, giving it a more cutting-edge appearance. 

For an adjustment layer with a gradient map, select Layer > New Adjustment Layer > Gradient Map. In the Gradient Map dialogue box, pick the gradient you want. Additionally, you may make your gradient by selecting the gradient preview and changing the colour palette.

Step 8: Add a Levels Adjustment Layer

Add a Levels Adjustment Layer

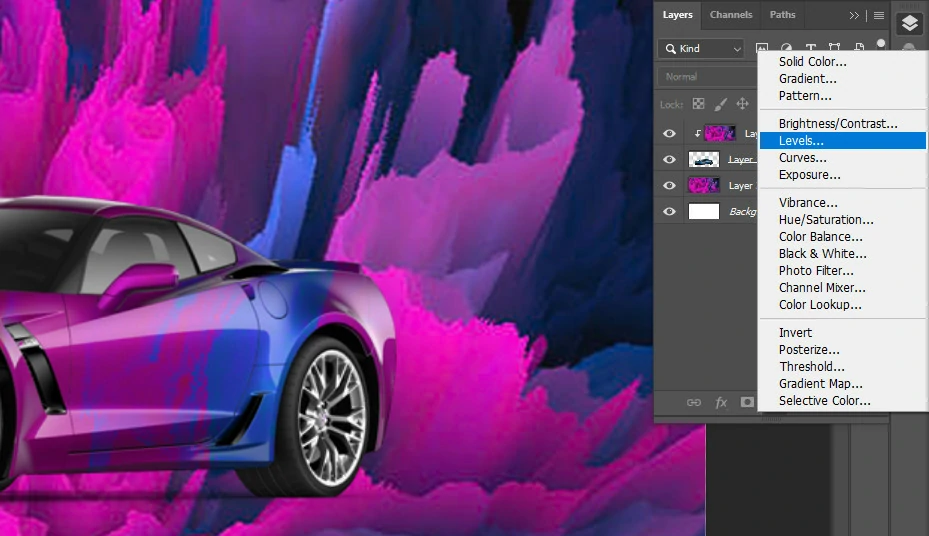
You may add a Levels adjustment layer for the ideal contrast and brightness levels for your vaporwave vehicle backdrop. To get the perfect look, you may modify the brightness and contrast of your image using this Layer. 

Go to Layer> New Adjustment Layer > Levels to add a Levels adjustment layer. The Levels dialogue box’s sliders can be adjusted until you’re satisfied with the outcome.

Step 9: Add a Vibrance Adjustment Layer

Add a Vibrance Adjustment Layer

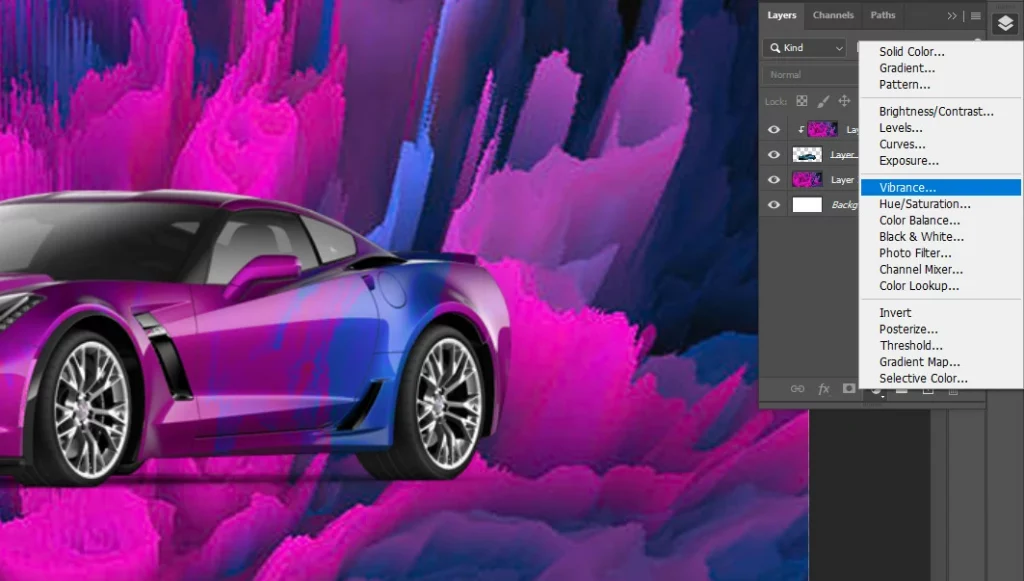
Apply a Vibrance adjustment layer to your image for the last touch of saturation and brightness. 

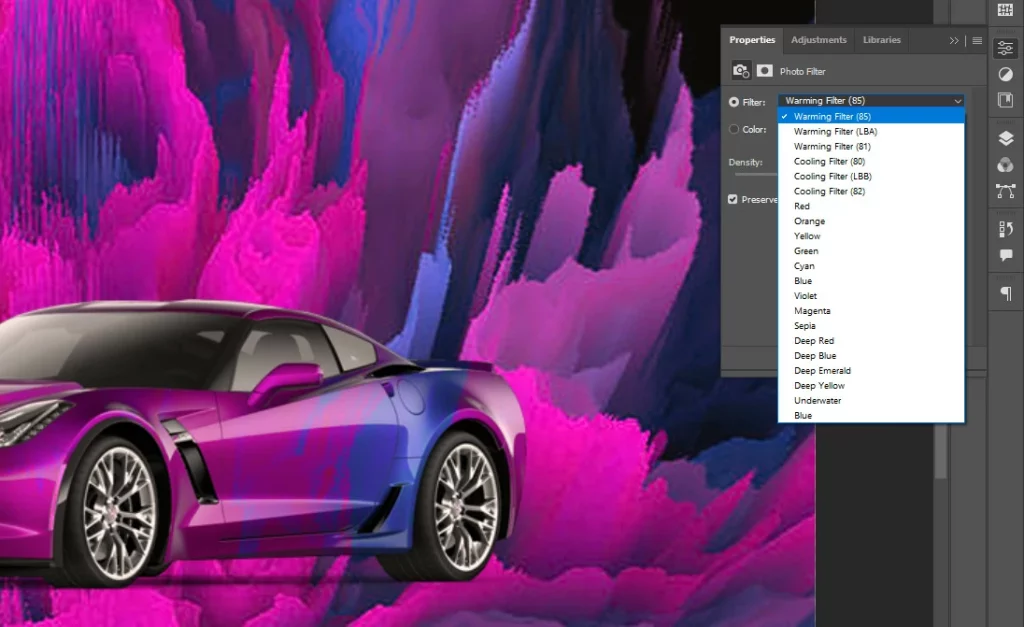
Go to Layer> New Adjustment Layer > Vibrance to add a vibrancy adjustment layer. The Vibrance dialogue box’s slider can be adjusted until you’re satisfied. By selecting the Filter option at the top, you may also add noise. A few tweaks here and there can bring better results. 

Step 10: Add a Glitch Effect

Add a Glitch Effect

The glitch effect is an essential component of the Vaporwave style. To add this effect, you can use a Photoshop action or plugin. You can also create the glitch effect manually by duplicating the “Texture” layer, applying a displacement map, and adding noise.

You can use the texture you used previously. You can create another version of it by adding the glitch effect. All you need to do is select the liquify tool in photoshop and distort the texture a bit until you are satisfied. Then add this new texture to the image as you did in Step 3.

That’s it! Now it’s time for your vaporwave automobile backdrop. You may use it as a background for your website or social networking pages, save it as a high-resolution image, or use it as your desktop wallpaper. You may quickly design your vaporwave graphics by following these easy instructions.

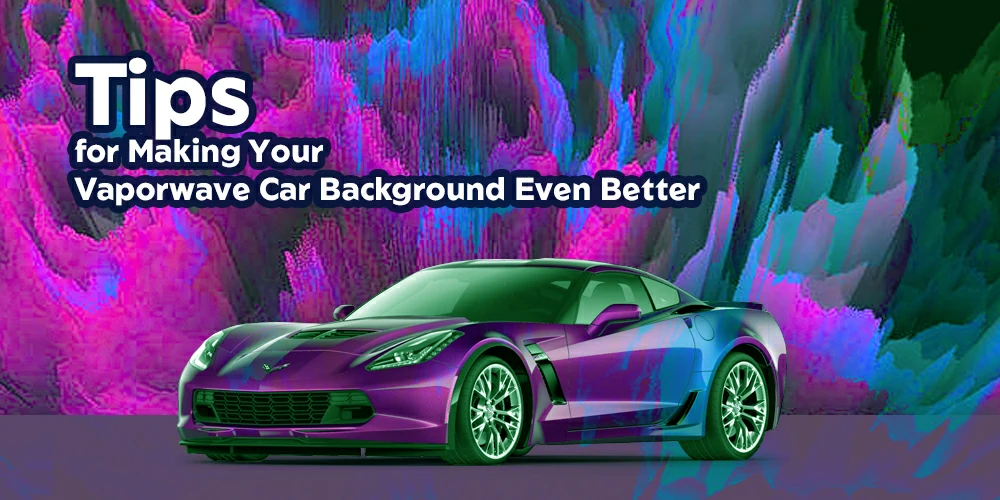
Tips for Making Your Vaporwave Car Background Even Better

Tips-for-Making-Your-Vaporwave-Car-Background-Even-Better

Although creating a vaporwave effect for an automobile photo background in Photoshop is a creative and enjoyable process, there are specific guidelines you can use to get a better outcome. Here are some suggestions to bear in mind:

  • Try out several filters and adjustment layers: To obtain the ideal appearance for your vaporwave automobile background, be daring and experiment with various filters and adjustment layers. Experiment with various filter and adjustment layer combinations to explore what effects you may get.
  • Use vivid colours: Vaporwave aesthetics are recognized for their neon and brilliant colours, so incorporate these into your finished product. The Color Balance and Gradient Map adjustment layers are available.
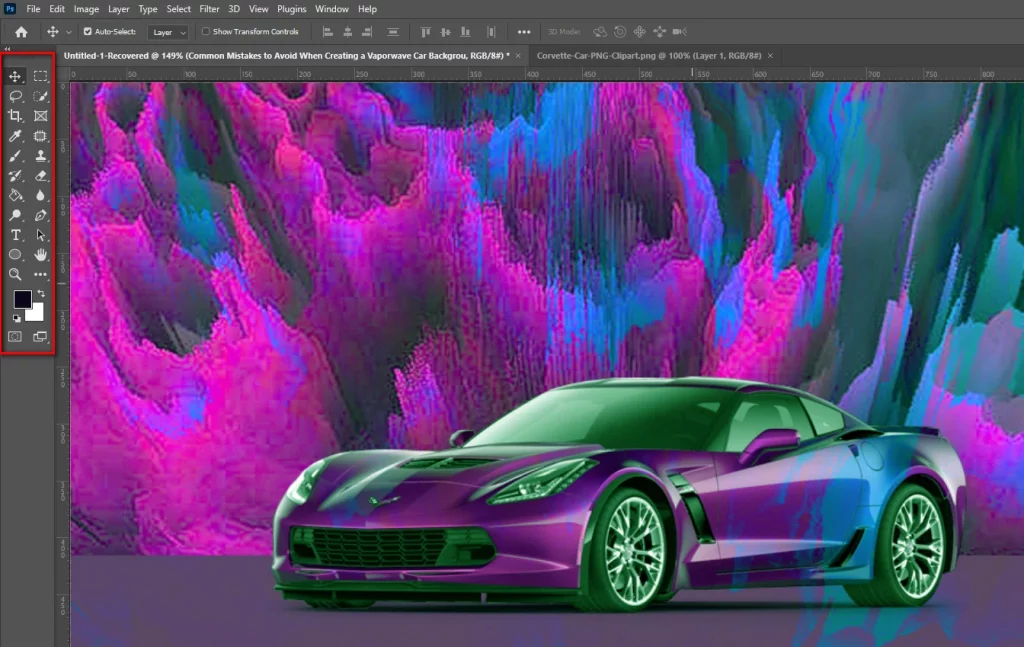
  • Consider adding text: To the backdrop of your vaporwave automobile, add another level of intrigue by adding text. To add text, you may use the Type tool in Photoshop or search online for visuals that adhere to the vaporwave look.
  • Please keep it simple: When it comes to vaporwave automotive backgrounds, sometimes less is more. Try to avoid utilizing too many precise details and instead concentrate on using bright colours and abstract patterns in your design.
  • Save your work: While working on your vaporwave vehicle backdrop, save your work frequently in case of unforeseen system breakdowns or power interruptions.

By following these tips, you can take your vaporwave car background to the next level and create an eye-catching and unique design that’s sure to impress.

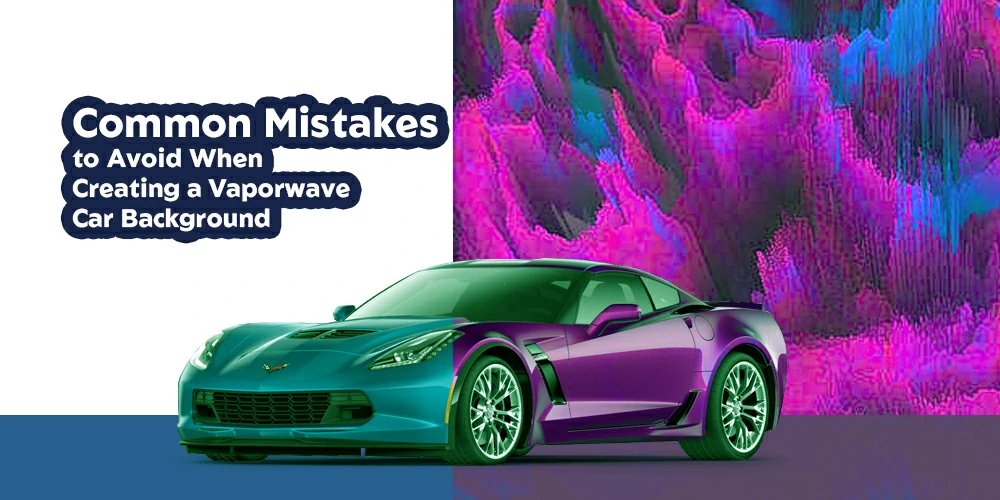
Common Mistakes to Avoid When Creating a Vaporwave Car Background:

Common-Mistakes-to-Avoid-When-Creating-a-Vaporwave-Car-Background

No matter how professional an image editor we are, we all make common mistakes while editing photos. While creating a vaporwave effect for car photos in photoshop, we make some simple and common mistakes. We need to avoid those, and some of them I mentioned below.

  • Overusing filters: It’s simple to use too many filters while making a vaporwave automobile background. However, too many filters might result in a crowded, amateurish appearance.
  • Not altering the colour balance: Although many people need to pay more attention, colour balance is essential for making a vaporwave automobile backdrop. Make careful to correct your image’s colour balance so that it seems vivid and colourful.
  • Ignoring contrast and brightness: Lack of contrast and brightness might result in a lifeless, boring background for your vaporwave automobile. To achieve the ideal appearance, constantly modify the brightness and contrast levels.
  • Ignoring the picture size: The final product’s quality is greatly influenced by the size of your image. Use large, high-resolution photos that may serve as backgrounds wherever possible.

Additional Photoshop Tools to Enhance Your Vaporwave Edit:

Additional Photoshop Tools to Enhance Your Vaporwave Edit

While doing this photoshop tutorial at home, here are some additional photoshop tools that you can play with to enhance your vaporwave editing:

  • Layer styles: It gives your image additional effects like shadows, glows, and bevels. They could help your vaporwave automobile background seem better overall.
  • Blending modes: These tools let you combine two or more layers to produce fascinating effects. Try several blending options to discover which suits your vaporwave automobile backdrop the best.
  • Text and forms: Text and shapes may give your vaporwave automobile background a more dynamic and artistic appearance. Shapes may be used to make futuristic patterns, and text can be used to add lyrics or quotations to your artwork.
  • Brushes: You may use brushes to give your vaporwave automobile backdrop more texture and dimension. Use several brush types to get a distinctive effect.

FAQs:

What is the vaporwave aesthetic?

The vaporwave aesthetic is a retro-futuristic style that combines neon colours, bold geometric shapes, and a nostalgic feel. It was inspired by the visual culture of the 1980s and 1990s, and it has become increasingly popular in recent years, especially in digital art.

What is the purpose of using a Displace filter in Photoshop?

The Displace filter creates a wave-like pattern in your image, which is perfect for creating a vaporwave look. You can create a more futuristic and abstract feel by distorting your image.

Why use a Color Balance adjustment layer in Photoshop?

The Color Balance adjustment layer is used to change the overall colour balance of your image, making it more saturated and bright. Adding this Layer can create a more vibrant and neon look for your vaporwave graphics.

What is the purpose of using a Gradient Map adjustment layer in Photoshop?

The Gradient Map adjustment layer is used to apply a gradient of colours to your image. This Layer is perfect for creating a more futuristic and abstract look and adds colour to your vaporwave graphics.

What is the purpose of using a Clouds filter in Photoshop?

The Clouds filter is used to create a cloud-like pattern in your image, which can be used to add texture and depth to your graphics. Adding this filter can create a more dreamy and abstract look for your vaporwave graphics.

What is the purpose of using a Levels adjustment layer in Photoshop?

To change the brightness and contrast of your image, utilize the Levels adjustment layer. This Layer ensures that your vaporwave graphics have the correct contrast and brightness levels, giving them a more polished and professional look.

Conclusion

Learning how to create a vaporwave car background in Photoshop is vital for car image editing experts. It can be a fantastic place to begin learning about vaporwave graphics, regardless of your experience as a graphic artist. 

Because it’s a simple and enjoyable process to make a vaporwave automobile background in Photoshop by following a few straightforward steps.

You can make distinctive and captivating visuals ideal for desktop backgrounds, social media graphics, or website backgrounds by mixing filters and adjustment layers.
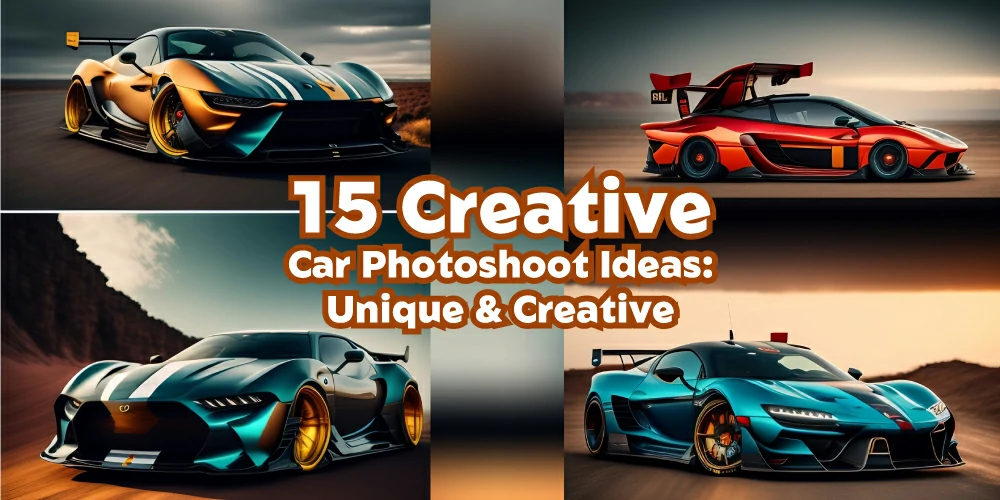
15 Creative Car Photoshoot Ideas: Unique & Creative

Taking photos of cars can be fun, even if you don’t have a car worth a lot of money. You can still take pictures of your family’s car, which will be just as exciting! I will discuss 15 creative car photoshoot ideas that are unique in this article today for you. 

Since they were invented, cars have symbolized the freedom and adventure of traveling on the open road. They are a means through which individuals flaunt their identity and position. 

People take great pictures of cars because they are so sleek and streamlined. Some people use car photography to show off their car’s beautiful design, while others use it to capture the meaning behind the vehicle. 

If you’re looking for something new to try in photography, you should explore automotive photography. This tutorial will teach you car photography tips that will help you take your photography to the next level.

Here are 15 creative car photoshoot ideas to help you get started.

Things to consider before starting car photography:

Things-to-consider-before-starting-car-photography

Before car photography, You should consider where the background is excellent and what location makes sense for the car. Plus, you should make sure you can safely park the vehicle. You can also go to track days to practice your photography. 

When shooting photos of cars, some things to keep in mind include thinking about the composition of the image, the light conditions, and the background. Pay attention to the angles you’re shooting from, your camera settings, and other factors. 

You don’t have to be an expert in photography to get good car photos, but by taking the time to think about what you’re doing, you’ll get better results.

15 Creative Car Photoshoot Ideas

To make your car photography stand out, try doing something different from the other photographers. If you have a car you like, take photos that are memorable and shareable. 

You can do this by going to a cool spot, using your smartphone, or doing something special. The 15 creative car photoshoot ideas and methods for shooting autos are listed below. 

You can also take some beautiful images of your car by following these car photoshoot ideas. Let’s learn the most creative and unique ideas for doing professional car photography.

  • Choose the Right Time of Day to Shoot In: Choose-the-Right-Time-of-Day-to-Shoot-In

It is essential to plan your shots to take great car photos. Avoid taking pictures in the harsh midday sun, resulting in blurry images. Take your pictures around dawn or dusk instead, when the light is softer and more attractive. 

Shooting in low light can produce shadows and less contrast because of the lack of light. You can also try this out at different times of the day before or after sunset, but make sure to avoid direct sunlight in the process.

When you take a picture of a car in the sun, be careful that the car’s surface is very reflective. It is not a problem if the automobile is parked in a way that shields the sun’s rays or if it has a matte surface. 

On an overcast day, the bright sky can create a soft background for photos of cars. Although filming in the rain is not ideal, ominous clouds may make the background more impactful. 

  • Shoot from Another Vehicle: Shoot-from-Another-Vehicle

To take pictures of a moving car, you can shoot them from another vehicle. This will eliminate the need for the car to pan and make it easier to create motion blur in the background. But before you do this, remember to stay safe! When you’re shooting from a moving car, ensure the driver isn’t taking their attention off the road.

To take photos from a moving car, you’ll need two people: one driver for the vehicle you’ll be in and one driver for the car you’re shooting from. Make sure to discuss your plans with the drivers before you start so they stay caught up in action. Always wear your seatbelt, even if it’s possible to get a good shot by climbing around or leaning out the window.

  • Get Low or Go High:

Get-Low-or-Go-High

Try shooting from a different angle to make your automotive photography more enjoyable. It can give your images a unique look. When you take photos of cars, sometimes you can show off the car’s lines by shooting from a lower angle. It can make the car look bigger and more imposing. 

It’s okay to go on the ground and shoot a photo while lying there. You can get a good photo by positioning your camera lower than usual. 

You can also use a ladder or a step stool to get a higher angle, which is often used in professional car photography. You may use it to conceal your filming location as well. 

For example, it can be helpful when you’re learning how to photograph cars at auto shows. Going high will let you capture only your subject and crop out the people and vehicles in the background.

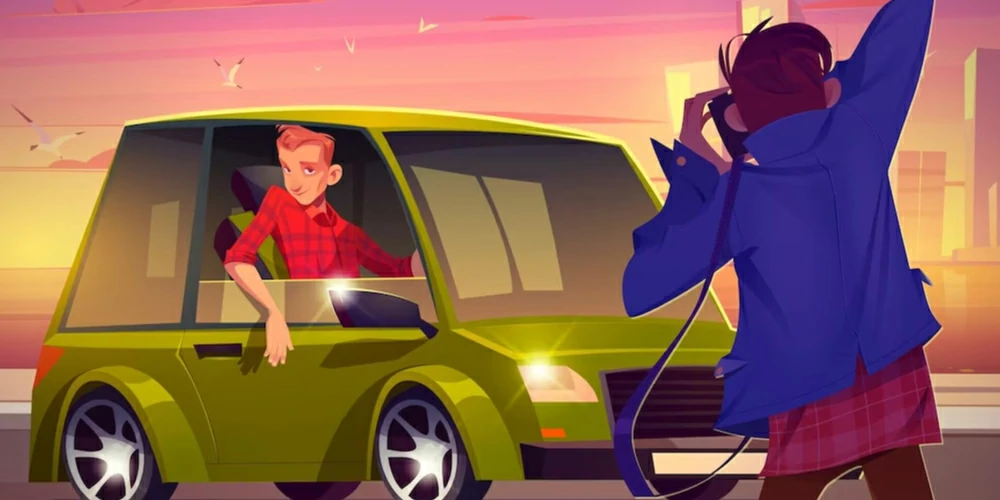
  • Add a Human Element to Liven up Your Photo:

Add-a-Human-Element-to-Liven-up-Your-Photo

When you take pictures of cars, you can include people and shots of people driving or standing in the background. You can also take photos of people in different poses, such as happy or proud, to show the car’s personality. 

You can find a good subject for a photo by thinking about the vehicle’s personality and target audience. When marketing your images, ensure to include models who fit the demographic you’re aiming for.

Photos of cars can make them more appealing to potential buyers. By including people in the pictures, you can show them that people drive cars and are part of the car culture. This will make it easier for your customers to comprehend what it’s like to own and operate a car.

  1. Choose the best composition:

Choose-the-best-composition

When photographing cars, you should experiment with different composition ideas to see what looks good. There is no one “right” answer, but some classic ideas work well, like placing the car in the photo according to the rule of thirds. 

Imagine your image is divided into thirds, horizontally and vertically. If you want to take risks, go off the grid and place the car anywhere you like!

You can use a camera with an articulating or tilting screen to take good car photos from a low point of view. You’ll want to experiment with the best angles and crops to create a portfolio, gallery, or montage of car shots. 

Remember to capture both the inside and the outside of the car, and be mindful of what’s happening in the background of your photo.

  • Panning for motion blur:

Panning-for-motion-blur

We know that moving cars look more exciting than pictures of vehicles that are still. Cars are designed to move quickly, so even if you take a beautiful view of a stationary car, an image of a moving car will look more exciting. 

Sometimes, when you take a picture of a car moving, it will be blurry because the wheels are spinning or the background is flying by. To add motion blur to your photos, you’ll need to keep your camera stationary and focus on a subject. 

Then, slowly pan the camera along with the subject, keeping it focused. 

Everything in the backdrop will be blurred when you take the picture by completely depressing the shutter release button. To take a good, exciting picture of a car moving past you, you need to pan the camera along with the vehicle. 

To do this, set the shutter speed to 1/125 seconds and adjust the other settings to balance the exposure. The car will be in sharp focus, while the wheels and background will be blurred. When taking pictures like these, make sure you have a great background.

  1. Try a little post-processing:

Try-a-little-post-processing

Most photographers use different software to do post-production work on their photos. Lightroom is usually the best application for handling many images at once under specific lighting conditions, but you can also use Photoshop for more complex editing. 

For quick editing, you can use free software such as GIMP.

After taking the picture, the post-production editor will adjust the photo’s curves, white balance, saturation, and exposure. 

They may crop the image to avoid unnecessary parts, adjust the sky composition, or change the sky color.

  1. Find the Best Lighting Conditions for Well-Lit Images:

Find-the-Best-Lighting-Conditions-for-Well-Lit-Images

To take incredible landscapes and photos, you must decide when to take your shots. The ‘golden hour,’ which is the first hour following dawn and the final hour of light before sunset, is when you should take photos. 

If you’re shooting photos of cars in the sun, you can use a reflector or an umbrella to get some shade. And, if you want to make your photos look good, you can use a filter or shoot in the early morning or late evening.

Additionally, different car colors reflect other times of the day. So, checking the time of day before taking a picture is important. The color of your car will influence the background and location you choose for your photo. 

For example, a red car in a green environment will look better with a green background. And matte finishes looking better under different lighting conditions because they don’t reflect as much.

  • Use backlighting: Use-backlighting

To get an image with the sun in the background, you need to take the photo before the sun rises or sets. Then, you’ll need to adjust the exposure so that the sun looks how you want it. 

With the help of most photo editing software, you may later brighten the foreground by adjusting the highlights and shadows.

When you’re shooting pictures, experiment with different settings to see which one gives you a balanced image that you can later use to improve it. 

Editing software such as Adobe photoshop cc can help you fix mistakes in your photos when you go for post processing. Car image editing is a bit different from normal photo editing. You need highly professional dedicated automobile photo editing experts who can do your job successfully. 

  • Highlight the Best Bits:  Highlight-the-Best-Bits

You can take a great picture of a brand-new or well-maintained vintage car by taking photos of the details. For a brand-new car, you should focus on the logo, the dual-tone design on the front grill, or the badges on the back. 

For a vintage car, you should focus on absorbing details like the logo, the dual-tone design on the hood, or the rust on the vehicle.

This could be used as one of the images in your photo slideshow. Sometimes, the hubcaps on a car can be interesting, and with the logo and details, it can make for a great image.

  • Shoot a Picture with Car Interior:

Shoot-a-Picture-with-Car-Interior

Interiors are vital in driving, but capturing them can be difficult. This is because the interior is its world, and buyers will see it daily. So it’s always a good idea to shoot a car from a distance, which buyers will see most of.

The exterior shots are essential for setting the tone and making a first impression on potential customers, but the view inside will seal the deal. So it’s important to take good pictures of the inside of your home. 

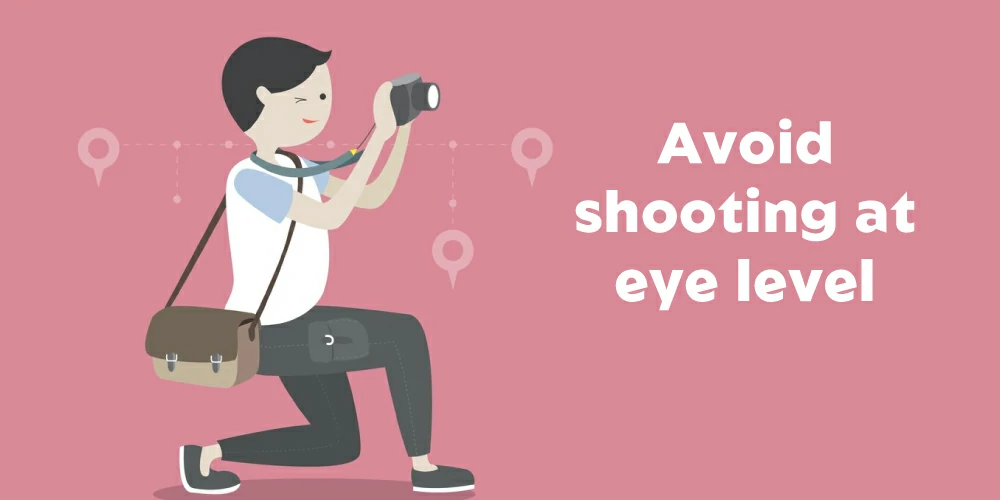
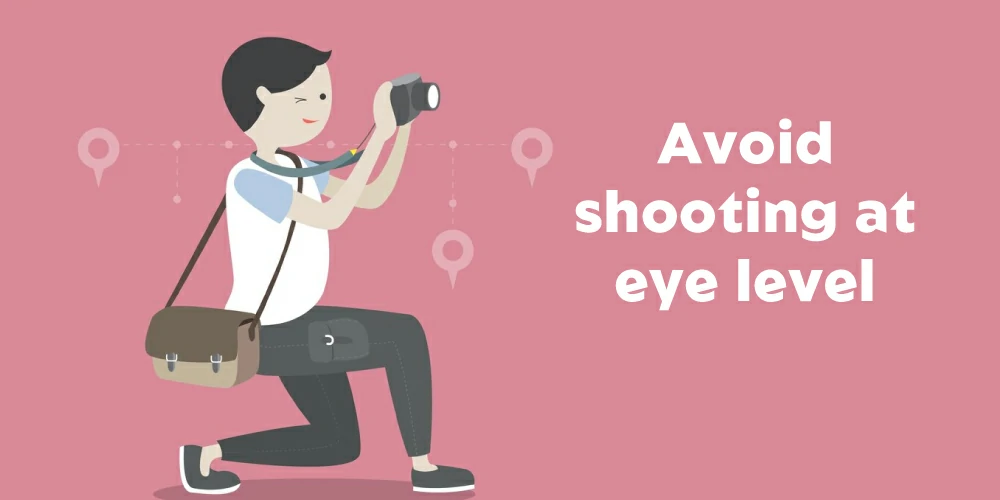
  • Avoid shooting at eye level:

Avoid-shooting-at-eye-level

Some people like to shoot photos of cars the same height as the car. This angle is natural because it’s what we see when standing in front of the vehicle. However, there are better angles to take a car photo than this one because it is not flattering. To take a good picture, you can hold the camera high up in the air or lower it close to the ground. You can use a ladder or step stool to do this.

If you want to shoot a car in a parking lot, the best way to avoid looking like you’re shooting is to get close to the ground or in a tight spot so that the car’s surface markings don’t give away your location. You can use things like trees or vehicles to make a background for an image. Sometimes, capturing a small part of the object makes for a great photo.

  1. Avoid Distracting Backgrounds:

Avoid-shooting-at-eye-level

Check the backdrop of every photo you snap to make sure there are no distracting elements. This includes things like cars with bright, shiny surfaces. As a result, the image could appear distorted and be challenging to discern what is there. 

To make your car photos look good, you should avoid anything that takes your attention away from the photo and instead focus on what makes the image look good. This means avoiding things like distracting objects in the background or foreground and instead using only things that add to the photo.

  • Shoot vertically:

Shoot-vertically

Some car photographers only take pictures of cars from the front or the side. But there are better ways to get good feedback from your audience. You have to show them both your vertical and horizontal car shots. Sometimes one type of shot is better than the other for some platforms. To take perfect vertical shots of a car, you must divide your frame into three equal parts and place the vehicle in the middle. Then, keep the foreground clear, so the car stands out. That way, your photos will be perfect!

  • Shoot a Picture with Car Exterior:

Shoot-a-Picture-with-Car-Exterior

It would help if you had a wide lens to take a good car picture. You can shoot from below to show the vehicle from all sides. This position and angle make the car look its best. You can also focus on some exterior details to capture the car’s logo, rims, and other specific features. Car photography can be a great way to show off a model’s clothing or as a background for a portrait.


Frequently Asked Questions (FAQ):

Que: Why should you avoid parking lot lines during car photography?

Ans: Don’t park your car in a parking lot with white lines showing through the asphalt. They can make the car look ugly, especially when it’s from a classic era and parked in a modern lot. However, unless you enjoy spending a lot of time editing your images after taking them, stay away from stripes. There are few exceptions to this rule, such as when there are striking designs like large arrows or vibrant grids.

Que: Why are polarizing filters important to take perfect images of cars?

Ans: Sometimes, reflections look good in pictures. For example, when you are taking a picture of a car with a lot of land on the side of the vehicle. But sometimes reflections can be bad, like when the car is a large mirror to its surroundings. That’s where a polarizing filter comes in. You can rotate it until the reflections disappear. Remember, though, that you may have to rotate the filter again each time you take a picture from a new position.

Que: What are the best car photography poses?

Ans: You don’t have to take pictures of someone sitting in a car. You can shoot photos of them in different poses, like lying down or standing near the driver’s seat. This can make your photos more moody and exciting. You can make a great travel photo album by taking pictures of yourself in front of different cars. You can sit on the hood or trunk or stand close to the car to get more interesting shots. You can also add accessories to match the car’s color or wear sunglasses to make your photos more interesting.

Que: Which angle should you try for professional car photography?

Ans: To be a good car photographer, you must learn to use different angles. Some of you could become perplexed when considering the best angle to photograph cars from. There are some excellent car photography angles to take car photos from the front left, front, back, back left, and side angles. Use a tripod to avoid shaking, and practice a lot! To get different-looking photos, you’ll need to adjust the height of your tripod. Try different angles, and don’t take pictures from eye level – you might get better shots from a higher angle.

Conclusion:

To become a professional photographer, you must learn 15 creative car photoshoot ideas. It would help if you practiced every idea to become a perfect car photographer. In terms of photography, repetition is the key to improvement. 

The more shots you take in different lighting conditions, the better you’ll understand how different lighting makes a car look. This will help you improve your photography skills even further on your next shoot.

To take good photos of cars, you’ll need to practice the physical motions involved in panning for striking action shots. And, to do that, you should spend an evening just playing around with Lightroom. 

By adjusting the settings on the software, you can create different moods in your photos. After following these 15 creative car photoshoot ideas, you can take some good shots of your car. However, let us know if these car photography tips are helpful.

error: Content is protected !!